Introduction
You may have noticed that your radiator valves look outdated. Your radiator thermostat valves might have started leaking, or they may be manual valves being replaced with a thermostatic radiator valve. In any of these scenarios, you must be careful when changing the valves. This guide demonstrates the steps you need to take.
No matter why you need to replace your radiator valves, we will walk you through the procedure in six simple steps. We'll also explain how to empty the system and explain how to change a radiator valve.
The way the valves are attached may change slightly depending on the radiator that needs the valves replaced. While others are connected to the water pipe rising through the floor, some are anchored into the wall. While some contemporary heating choices, like a ladder towel rail, may have valves installed from the wall, traditional heating options, like column radiators, frequently have the valves linked to a water pipe from the floor.
Change a radiator valve: instructions
When you follow these six simple procedures, changing a radiator valve is straightforward. If you want to add a new valve to an existing pipe and radiator and don't need to remove any radiator valves, proceed to step 4.
Step 1: Turn off the heating system and the water.
This approach works great for combi boiler systems, but it will be better to get assistance from a licensed heating professional.
Contact a boiler technician near you
Isolating the water supply is necessary before changing the radiator valve. We'll also need to turn off the heating system because if we stop the water from entering the boiler, it may overheat and burn off the pumps.
Step 2: Find the shut-off valve.
The lowest point in the home is often where this drain-off is positioned. At this stage, you'll need a hose to connect to the drain, and you'll want the hose's other end to be outdoors, ideally where the water may drain into the ground or a nearby drain. The hose can be secured to the drain cock with a jubilee clip to avoid spillage.
If you open the air valve before turning on the drain valve, you'll hear air entering the radiator, which indicates that the radiator is draining its water. Please wait until all the water has been removed; this might take up to 10 minutes, but it could also take longer.
To prevent minor drops, place a cloth beneath the valve.
More significant amounts of water left behind will be easier to collect in a basin (that can fit below the radiator).
3. Dispose of the outdated radiator valve
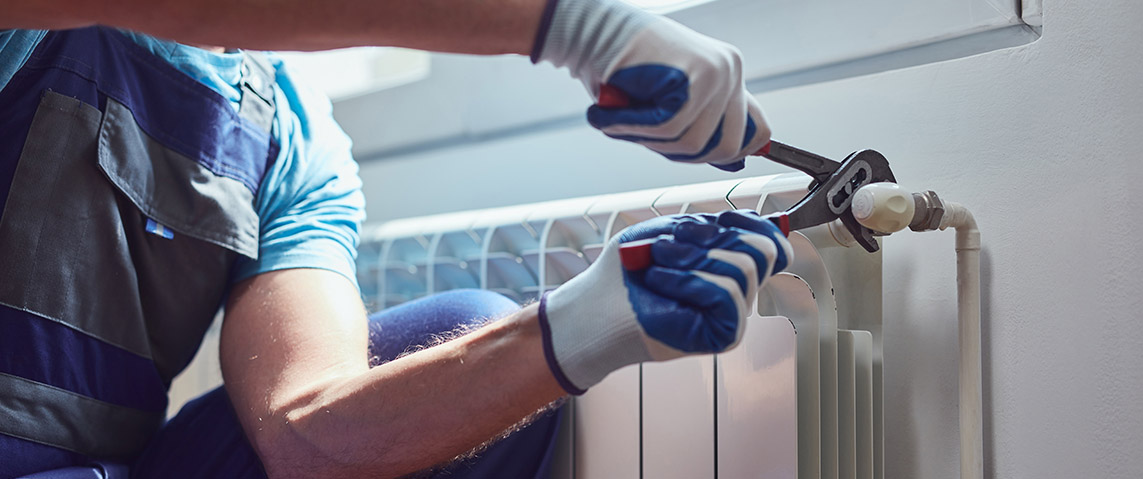
You may remove the radiator valve by removing the top and bottom nuts. You might need the wrench to retain the valve body at this stage. The water may be soiled, so put the towel below to avoid wetting the floor. There will be a small amount of water that pours out.
You would want to thoroughly clean the region before replacing the radiator valve.
4. Installing the replacement radiator valve
We'll now go through manual and thermal relief valve installation procedures for radiator valves. You should cover whichever one you're fitting.
Take your new radiator valve body, align it with the radiator tail, and place it into the water pipe. Please be patient because this might be a little tricky.
After the body is in position, tighten the nut on the tail and the water pipe's bottom.
Remove the protective cap off the top of the valve body once they are snug (but not unduly so). This is often screwed on, so unscrew it. Take the valve's top and attach it to the valve body. Once it is connected, you should carefully tighten the nut; take care not to over-tighten it. You might use a cloth to avoid harming the valve's finish when tightening nuts with tools.
Step 5: Restart the main water valve.
Now that everything has been straightened up, it's time for the big reveal. The bleed valve, found at the top of the radiator, should also be closed along with the other valves you have already opened.
You need to turn off the radiator valve to slow down the rate of water flowing into the radiator and to control how fast the water heats. Remember how many turns it takes to close the lockshield when you turn it off you'll need to open it precisely the same number of times later. You'll need to rebalance the system if you neglect to notice this.
Restart the water supply and fill the system as you watch for leaks in the new joints. Open the new radiator valve after you're satisfied so that water may flow into the radiator, and recheck for leaks. If there are any leaks, follow the steps we have suggested above.
6. Radiator bleed
Open the bleed valve to release any trapped air in the radiator once you are confident that the radiator and valve are not leaking. Any trapped air will prevent the radiator from warming up.
Once the lockshield valve is opened, the water will start to flow again. To determine the precise number of revolutions (turns), refer to your notes from Step 5.
The boiler may now be powered on once again, allowing you to restart it. After the heating has run for a half-hour or so, check each radiator one more time to ensure everything is operating as it should.
Check once again if the drain-off valves are firmly shut.
Bleed the radiators carefully.
Check your joints to ensure there are no leaks once you finish them.
Conclusion
The radiator valves being in good condition is extremely important for peak radiator health. Following every step mentioned in the exact sequence can ensure good functioning capacity of your radiator.
That said, kindly note that it's best to peruse the manufacturer's instruction manual before embarking on the valve changing endeavor, so you are fully equipped.
Your radiator valves and all other home equipment need periodic and predictive maintenance to continue functioning effectively. Secure them and cover unexpected repair expenses by insuring your boiler.


